Using Views in Revit to Improve Efficiency – Part 2
Courtney is back with more tips on using views to maximize efficiency in Revit. This time our BIM pro shares information about setting up default views. Happy designing!
Default View Type
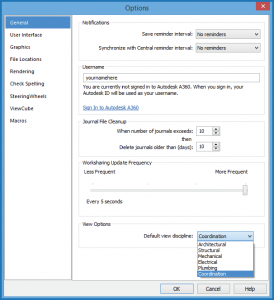
If you mostly work in one discipline and know the views you create will be of that particular discipline, you can set Revit to make that your default view type, rather than the out-of-the-box of Coordination. Open your Options Panel. Under the General section, at the bottom is a dropdown menu where you can choose the default view discipline.
Default View Template
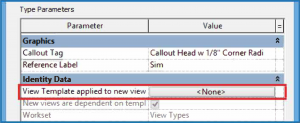
Similarly, you can create a default view template that will be applied to each new view created. With a plan view open, click on Edit Type in the properties panel.

On the dialog box that opens, click the button to select the view template to be applied to new views.
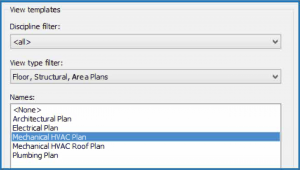
Choose the template you prefer to use for your views.
Tile Your Views
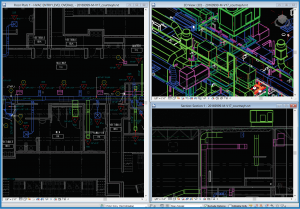
Sometimes it’s necessary to see what’s being modeled in multiple views. Instead of switching through tabs repeatedly (Ctrl+Tab to go forward, Ctrl+Shift+Tab to go back), you can tile your windows and see the changes as they’re happening. Click on the View tab and select Tile Windows.
Type WT, or from the View tab, in the Windows group on the right side, select Tile. All open views will be tiled.
Orient to View
3D views are helpful when needing to visualize a layout from different angles. Rather than opening multiple section and plan views, use a 3D view and orient it to a section cut. To do this, open your 3D view within the model, then right-click on the view cube at the top right. Mouse over the Orient to View sub-menu, then Sections, and select the section view to use.
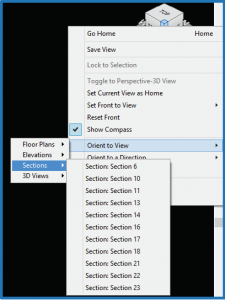
Your 3D view will show the extents of the section and you’ll be able to move the view cube around to see the building and equipment placement from different angles.
